Installing Windows 10 in KVM + libvirt
There’s a few “tricks” that are good to know when installing Windows 10 on kvm/libvirt. This is the way I install a Windows 10 VM and I’ll try to explain each step of the process. I’ll say right away that this may look like a very long post and therefore a long process, but the length is just images and this probably takes about 30 minutes if you chug through it!
Part 0: Download tools
Windows 10 LTSB
- Download Windows 10 LTSB (or LTSB N) iso
First, try your hardest to find a LTSB build of Windows 10. The Long Term Support Build (LTSB) is built by Microsoft for high security, long running applications (think ATM’s). The side effect of this is that it is an extremely stripped down version of Windows. It doesn’t have Cortana, or Edge, or anything really. In other words, it’s perfect for a VM that just does a few things you need, and nothing else.
LTSB is not a consumer product, so it’s a little difficult to get ahold of. I have a Visual Studio Subscription, so that’s how I got mine, but there’s a multitude of other methods you could use. The “N” version of LTSB has even less because it’s missing codecs (that can easily installed if needed), so LTSB N will work also.
Install virt-manager
- Install libvirt, qemu, virt-manager, virt-viewer and all the fixins
I’m not going to go into great detail here, because for the most part this is a matter of running sudo apt install a couple of times, and there’s already some guides out there.
You don’t need to do anything special like set up a bridge device, because we’ll be using virt-manager to handle that.
I’ll assume you have kvm, qemu, etc. installed and you are able to run them as a normal user (sudo not needed).
Then, make sure you also install virt-manager and virt-viewer.
The versions in the official Ubuntu repo should be fine - no need to go to a ppa or install from source.
Download Windows Tools and Drivers
- Download extra Windows drivers and Spice guest tools
We will want to improve the performance of our Windows install by using as many paravirtualized devices as possible. If you don’t know what paravirtualization is, don’t worry - it’s just a way of teaching Windows to “speak” the same language as KVM, so that Windows and KVM can communicate faster and closer to the hardware level.
The Windows drivers, called Virtio, are available from Fedora and you will want to use these drivers regardless of your Linux distribution (i.e. even if you’re using Ubuntu). Download the iso version of the drivers from the Fedora page or from this direct link.
Part 1: Prepare New VM in virt-manager
- Set VM to use all virtio drivers
It’s far easier to install Windows using virtio drivers to begin with than to convert an existing install.
Start by creating a new VM in virt-manager: 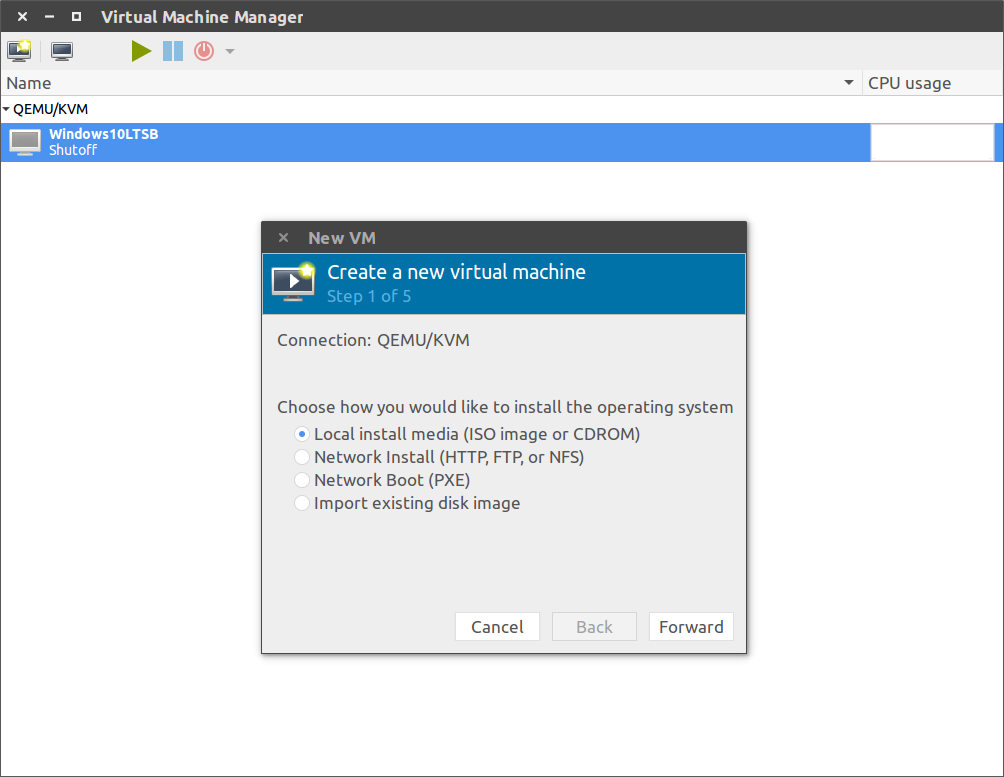
And select your Windows iso as the install media: 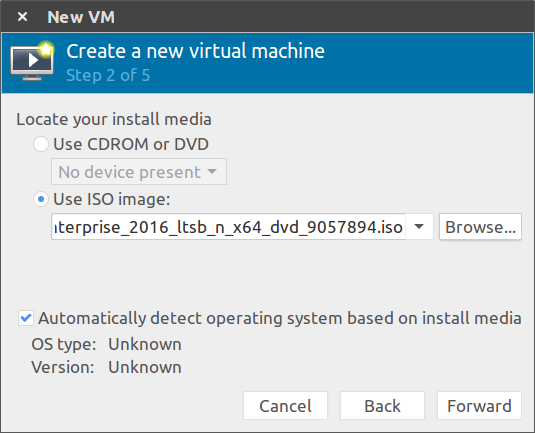
The amount of RAM and CPUs doesn’t really matter, but it’s Windows so I like to give it at least 2 CPUs and 4 GB of RAM.
Enable stoage of the VM and give it at least 30 GB of storage. The VM will only use what it needs up to this amount, so there’s no harm in making this bigger than you actual need. 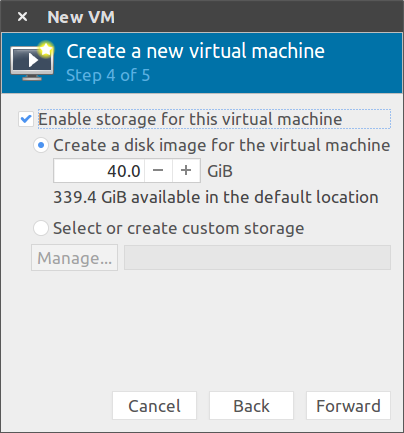
Next give your VM a name, here I will use “Windows10”, and check the box “Customize configuration before install”: 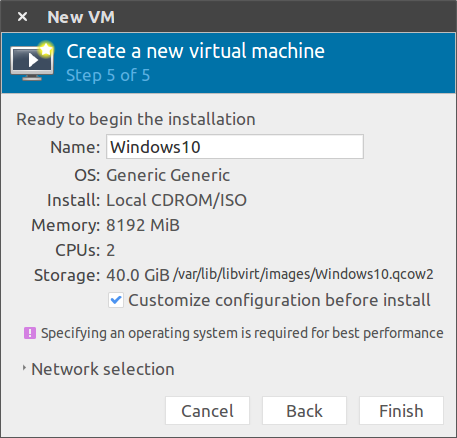
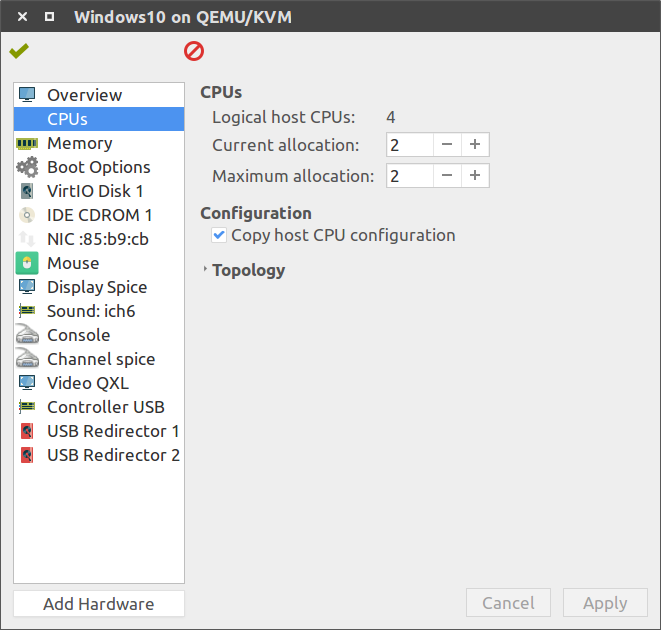
When you click Finish, a configuration tool will come up, and it’s here that we will optimize performance of our VM by setting everything to use virtio drivers.
- Under “CPUs” check Copy host CPU configuration
- Under “IDE Disk 1” open the Advanced options and change Disk bus to VirtIO, and optionally change Cache mode to “writeback”.
Writeback means that when the Windows VM makes a write to disk, the host OS will cache this write in memory and tell the VM that the write is complete, before the write is saved to the host HDD. This is dangerous because it can corrupt the Windows VM if there is an incomplete write, but is faster than the default settings. Personally I use writeback because I never have a long running VM, and I take backups often. 
- Under “NIC” change device model to virtio

Make sure that the Display is set to Spice server rather than VNC, and that Video model is set to QXL (both of these are the default).
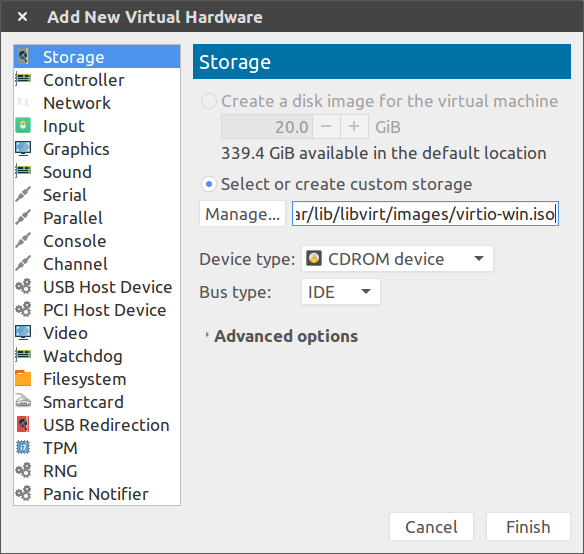
Click “Add Hardware” and add a storage device with type CDROM and select the virtio driver iso downloaded before as the “storage”. Then click Finish.
- Add hardware again and add an “Input” device with type EvTouch USB Graphics Tablet
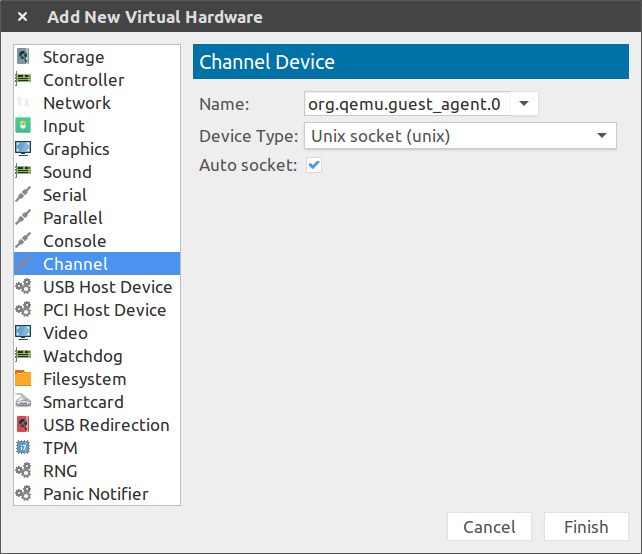
- Add hardware and add a “Channel” with name
org.qemu.guest_agent.0. Leave the other settings as a default.
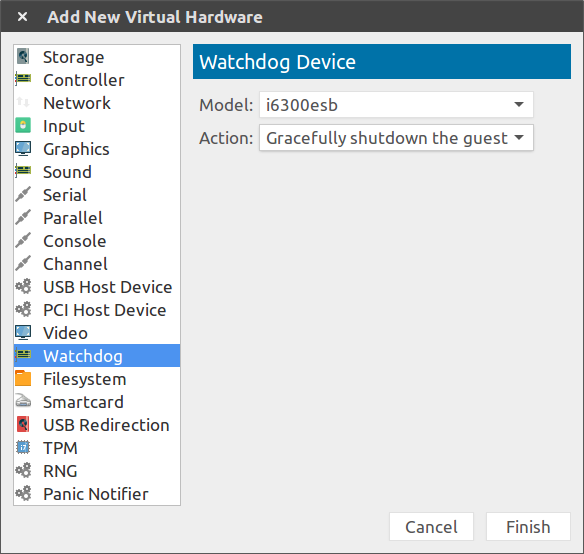
- Add a “Watchdog” device with action Gracefully shutdown the guest
Part 2: Windows Installation
- Install Windows
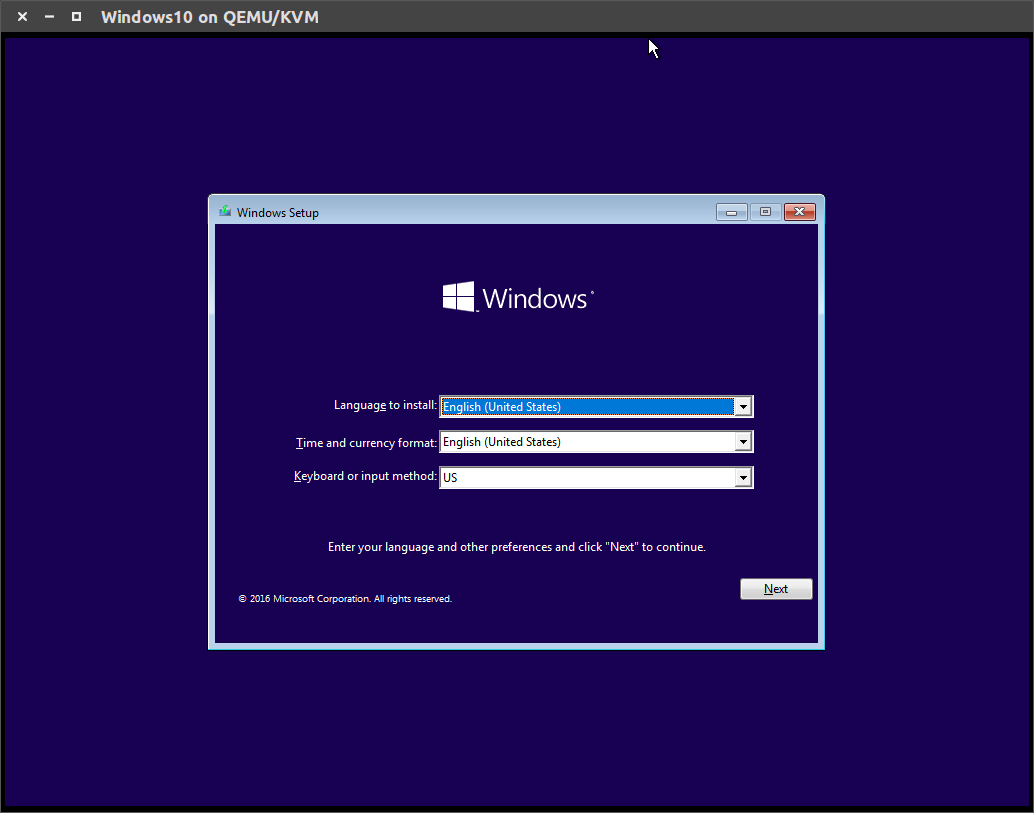
Finally, you can cick “Begin Installation”. A window should pop up with Windows installer. For the most part, this will be a very normal install.
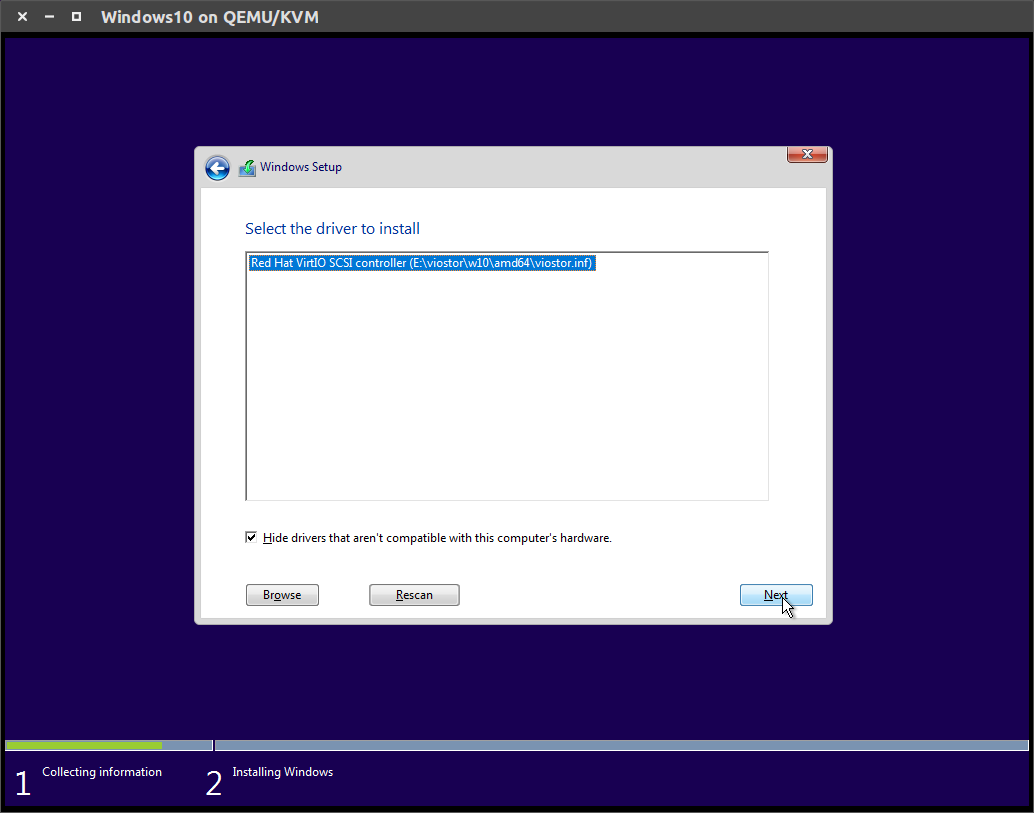
Just click through the installer until you get to the screen titled “Where do you want to install Windows?”. You will then have to click “Load driver” and browse to the location of the VirtIO driver. Browse to the CD drive that contains the extra drivers (probably drive E:) then to the directory:
E:\\viostor\w10\amd64

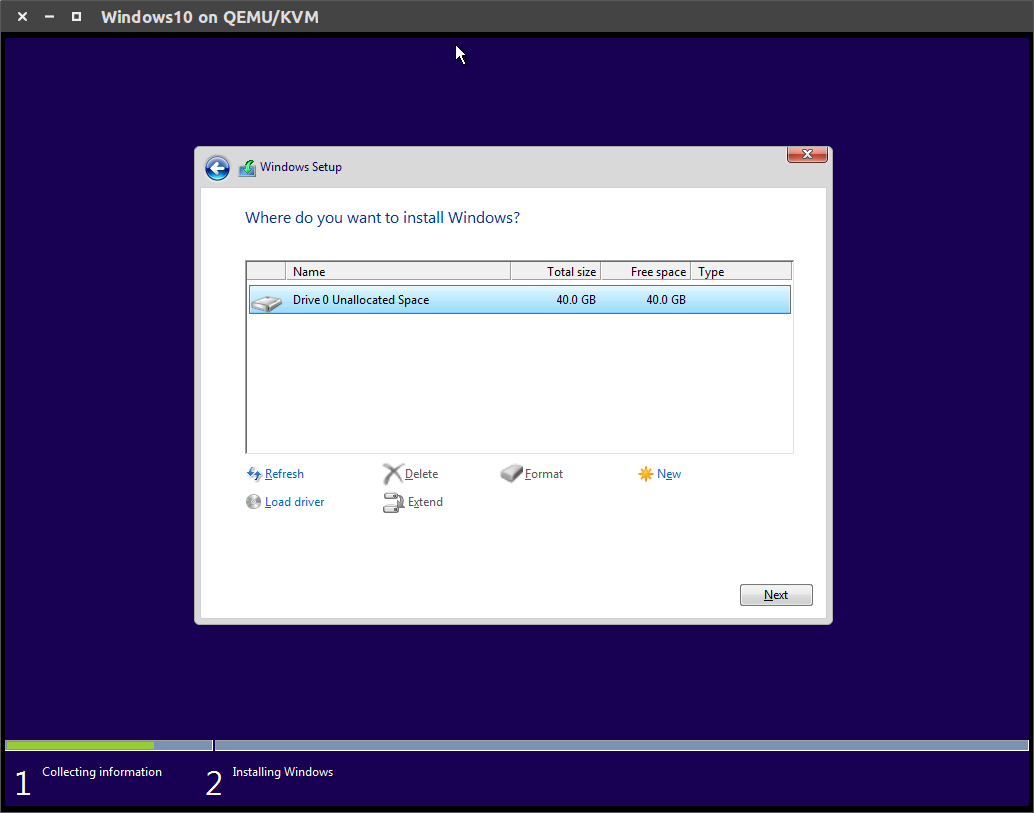
You should then have “Red Hat VirtIO SCSI controller” highlighted and press next to continue.
And you should now have a drive show up. Yay!
After you click next, Windows will do it’s thing and install. This is pretty simple, but I cetrainly recommend turning off all the spyware functionality of Windows. Just hit “Customize” rather than default settings, and turn off everything.
Continue through the setup, type in passwords, etc. until you get to the desktop.
Part 3: Guest tools and drivers
- Install Windows VirtIO drivers
The rest of the installation will take place inside the Windows VM.
This part is a little tedious. You will need to open a file browser, go to the CD drive that has the virtio drivers, and install almost every single driver. They all install kind of the same way. You navagate through the main driver folder, then w10, and then find the file with the type “Setup Information” - it should be a file with a gear icon. Right click on this and then click “Install”. An installer window will pop up and you just click through it.
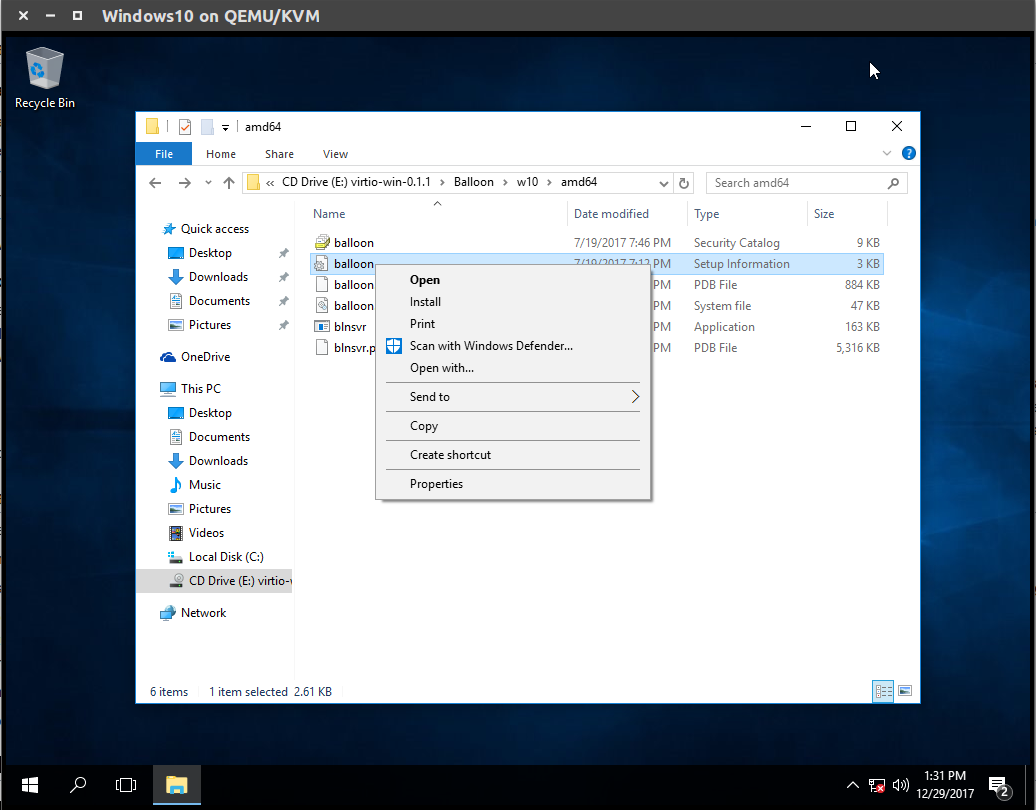
Some of the drivers install a little differently and not all have a w10 folder. If there’s no w10 folder (like the qxl, or smbus driver) then just skip that driver. After all the drivers are installed, reboot the VM.
Once you’re back into the VM, open a web browser and search for “spice guest tools” or go to https://www.spice-space.org/download.html. Scroll down to the “Guest” section, then look for “Windows guest tools - spice-guest-tools” and click. Download and install this exe. At this point you might want to restart the VM.
Part 4: Desktop Integration
- Create Windows 10 desktop file
With the VM open, open the menubar on the host and go to View -> Scale Display -> and check the box “Auto resize VW with window”. You will now be able to resize the VM window to any size and the Windows Desktop will automatically fit the window. This really helps to make Windows 10 feel like an application.
Next, create the file ~/.local/share/applications/windows.desktop with the following content:
[Desktop Entry]
Version=1.0
Name=Windows 10
Comment=Starts the Windows 10 VM
Exec=bash -c 'virsh start Windows10 && virt-viewer --wait -c qemu:///system Windows10 && virsh shutdown Windows10'
Icon=windows
Type=Application
In the Exec section, replace Windows10 with the name of your VM in virt-manager.
After logging out and back in, you will now have Windows 10 as an “application” that you can run from your launcher (Unity or Gnome Shell or whatever it is). If you shutdown the VM, the window will automatically close, and if you close the window without shutting down the VM, the Windows VM will safely shutdown in the background. This saves you from having to go into virt-manager to start your VM.